


Part Six
From all the sheet metal work and canopy pains we move on the firewall forward. Most of us in South Africa usually buy the standard engine and prop recommended by Vans as well as the firewall forward kit.
It is very important to read through your engine manual as well as the build instructions before trying to install the engine. Usually there are a number of oil lines and other fittings like manifold pressure fittings that should be installed on the rear of the engine at this stage. Also make sure that you install the steel fittings with reducers where needed. I often see normal AN fittings without reducers fitted that can have serious consequences should a pipe burst for example.
Make sure that you “clock” your fittings on the engine as per the instructions otherwise it will be almost impossible to fit the very sturdy and difficult to manipulate, oil cooler pipes for example. Other items to watch out for is where your firewall penetration points should be for your engine controls like Throttle, Mixture and Pitch. You often end up with a cable being too short just because you have made the hole through the firewall in the wrong place. Also consider and plan where wiring will go through the firewall.
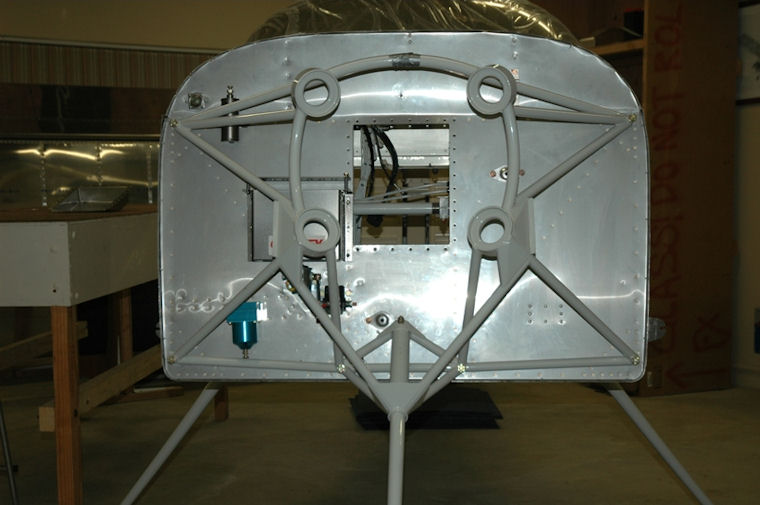
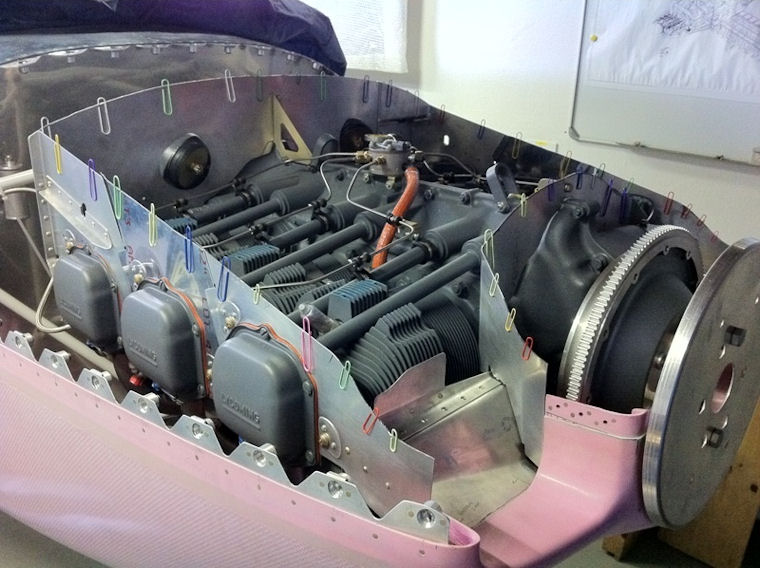
Typical Firewall with most items installed
Now is the time to hang that engine that will hopefully “pull” you through the African skies for years to come!
The next item on your list should be the engine cowls. I found that it is much easier fitting the cowls with a spinner template fitted to the engine. Either fit your spinner back plate or a supawood replica of it in position. This is much easier than having the real spinner and prop in place. You will know when you remove the cowls for the 99th time! I also prefer doing the first few fits and cuts with the minimum engine items fitted. So do it initially without throttle body, alternator and exhausts, but do fit them to make sure, closer to the end. Measure very carefully and cut in small increments to get a good fit. Two tips here:- Go for the maximum gap behind the spinner and also extend the air intake (vertical induction only) a bit more than what the plans call for in order to have a cowl that will easily be removed and put back on again. Obviously one has to shorten the air filter box slightly as well.
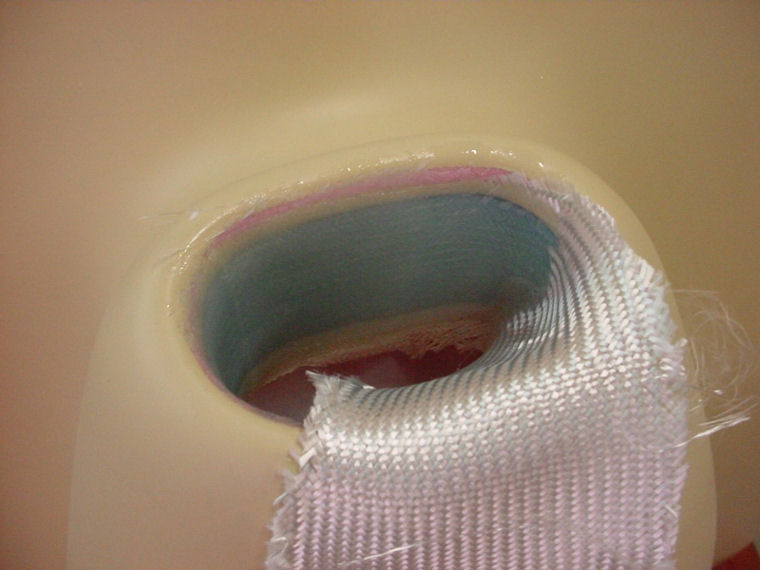
Air intake extension in the making
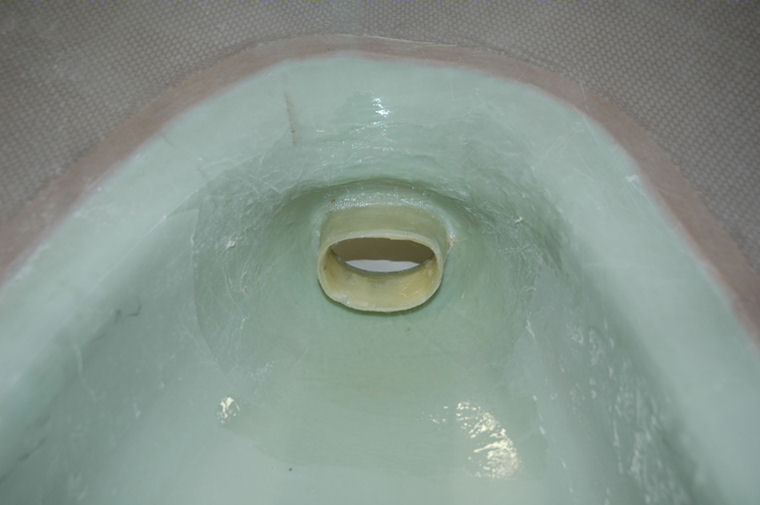
The finished product
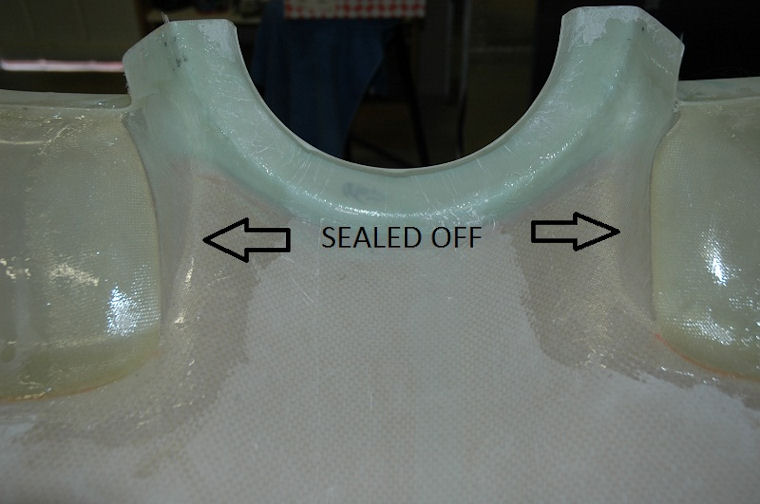
Seal off with fiber glass as indicated
First you have to figure out how to fit all the parts together and then starts the trimming. Keep the bottom cowl installed during this process to make sure the top cowl sits in the correct place each time.
One of the nicest ideas I have seen here is to use the “paper clip” method. It really saves a lot of time. Simply get a handful of paper clips and install them as high as possible all around on the plates. Carefully fit the top cowl and remove it again. Observe how much the clips have moved down, mark and trim. See picture below.
The paper clip method in progress
Once you are sure that you have trimmed it correctly it is time to install the rubber seals or your favorite after market plenum. Take your time with the rubbers seal and make sure you get a good fit. Many builders under-estimate the importance of a good seal. Remember that one of the most important aspects of air cooling is the pressure differential between the top and the bottom of the engine.
Finally it is time to add all the HT wires, sensor wires and many other things. Too many items to go into the details here.
Next month I will discuss attaching the fairings and wings. Keep on pounding!
 |
 |
 Copyright © 2024 Pilot's Post PTY Ltd
The information, views and opinions by the authors contributing to Pilot’s Post are not necessarily those of the editor or other writers at Pilot’s Post.
Copyright © 2024 Pilot's Post PTY Ltd
The information, views and opinions by the authors contributing to Pilot’s Post are not necessarily those of the editor or other writers at Pilot’s Post.